With colder weather setting in Thanksgiving week, it’s a good time to explore your underground growing success by digging root vegetables. Beets are a good example, the cool weather causing them to be extra sweet.
‘Chioggia’ beets named for a town across the bay from Venice are pictured here. They are a 65 day, Italian home garden variety with festive red and white striped interior rings. Try them roasted with feta cheese. Sweet!
Carrots are another mainstay. ‘Nelson’ (pictured) is a half-long variety well adapted to growing in our shallow, clay soils. A Nantes type, it grows 5 to 6 inches long in 58 days. It consistently produces smooth, high quality roots with great uniformity.
Make fresh harvested roots a part of your November vegetable menu.
You can store roots in the garden longer into December and even January by covering them with a blanket of mulch. A foot deep layer of fallen tree leaves weighted with wire fencing or staked with netting to hold them in place should do the trick.
Photo credits: Dug 'Chioggia' beet root, 'Chioggia' beet slices, dug 'Nelson' carrot - all Carl Wilson
Saturday, November 20, 2010
Thursday, November 4, 2010
Garden cleanup
Extended warm weather with many pleasant days has allowed ample time for garden cleanup. Though several hard freezes have killed warm weather crops, cool weather crops are still producing. If plants have overstayed their useful life, remove them. When cold-hardy cabbage family crops and others are finished, gather and dispose of all debris, preferably to the compost bin. If diseased or severely infested with insects, disposal off the property may be desirable.
One reason for a thorough fall cleanup is to avoid overwintering insects in your garden. For example, aphids overwinter as eggs as can be seen in the photo of kohlrabi, above right. Cabbage aphids (pictured left) and turnip aphids are the prime species found on cabbage family crops. Removing debris heads off an early spring aphid infestations. With some aphids on vegetable crops, it also eliminates the virus diseases that they can carry.
Photo credit: Cabbage aphids closeup (Brevicoryne brassicae) Whitney Cranshaw, Colorado State University, www.insectimages.org ; Aphid infested kohlrabi, Kale and kohlrabi debris, Raking debris – all three Carl Wilson
Thursday, October 28, 2010
Hard freeze strikes late
When the first widespread freeze finally came, it froze hard. Officially it was 20 degrees F at 6:30 a.m. at DIA. Considering the average first fall frost is October 7, the 28th of the month is nothing to complain about.
Hopefully you rescued what you could from the garden before the freeze. Somebody commented to me that tomatoes they’ve harvested in the last few weeks have had little flavor. Forty degree nights are flavor killers for this warm weather vegetable. It’s a good lesson in harvesting earlier for fresh use, or using the late proceeds in soups or sauces.
The squash and pumpkins should be in by now. This Carnival acorn is kind of spooky looking for Halloween and pretty ornamental in the garden. Good flavor too.
All that remains tucked in to the side of the frozen tomatoes are the cold-hardy greens such as kale, and the root vegetables such as carrots and beets. They will be good for another month or more. The root vegetables are particularly adapted for in-ground storage late into January if they are mulched.
Photo credit: Tomato harvest, Carnival acorn, Frozen tomato and pepper plants – All Carl Wilson
Thursday, October 21, 2010
Pumpkin hints
Many pumpkins seemed to mature early this year due to September heat. Pumpkins should be kept on the vines as long as possible IF the vines are healthy. If vines go down due to powdery mildew or frost, cut the handles from the vine to reduce shrinkage. This also avoids sunscald. Use hand pruners or long handled loppers.
Although we have had an extended period of warm weather, it will undoubtedly end soon. Pumpkins exposed to freezing conditions don’t store well. They should be harvested and brought indoors. You may have already brought them inside if they turned a solid orange and the rind was hard – a good move.
As long as pumpkins are starting to turn color, they will ripen and color off the vine. Recommended curing conditions are seventy degree days and sixty degree F nights. The area should be shaded, dry and well-ventilated. Remember that pumpkins for decoration are used through Thanksgiving so fruit late to color will still be useful. Cooking types can be cooked and frozen for later use.
Should you save seed from a particularly attractive pumpkin? Probably not since pumpkins cross readily with summer squash. Bees can carry pollen from as much as a mile away even if you don’t grow summer squash in your garden. Pumpkins don’t cross with fall squash.
Keep in mind that the pumpkins used for pies and eating, called sugar or pie pumpkins, have less water and better flavor than the strigy, Jack-o-lantern types. Most are a different species (Cucurbita moschata) as opposed to the decorative carving Jack-o-lantern varieties which are Cucurbita pepo. Grow different types of pumpkins for different purposes.
Check this “Pumpkin Eater” article by Shirley Perryman in the Food Science and Human Nutrition Department at Colorado State University for ideas about some novel uses of pumpkins and their health benefits.
What experiences did you have with growing pumpkins this year?
Photo credit: Pumpkin display, Pumpkins in garden, Just turning pumpkins harvested, Same green pumpkins ripened 3 weeks later - All Carl Wilson
Thursday, October 14, 2010
Saving seed
The desire to save seed is understandable particularly for people growing heirloom vegetables. It gives you more of a connection with plants you grow if you complete the seed to seed cycle. It can also be a connection to vegetables of your heritage, a contribution to preserving genetic traits for the future and perhaps could save you money on seed purchases.
First, the cautions. Don’t save hybrid seed because plants that grow from it don’t come true to type. In fact you will likely have all sorts of small to large plants and variable fruit in fruiting vegetables. F1 hybrid seed saving is a waste of time.
The self-pollinating vegetables are good bets for easy seed saving. They rarely cross with others of their kind and don’t need long distance separation or bagged flowers to prevent stray pollen from reaching flowers. Beans, peas, lettuce, tomatoes, peppers and eggplant are in this easy-to-save group. If you are growing ‘Brandywine’, ‘Cherokee Purple’ or ‘Mortgage Lifter’ tomato for the first time and like them, save seed if you are willing to grow your own transplants.
Open-pollinated varieties cross-pollinate but produce plants closely true to type if reasonably isolated by distance or time of flowering from other plants of their species. An example is ‘Straight 8’ cucumber. Wind-pollinated plants (corn) and insect pollinated plants (cucmbers, squash, pumpkins, melons) take more care to save because you have to pay attention to nearby plants and even hand pollinate.
Potatoes are popular heirlooms because tubers come true to type (no flowers involved). Baring disease accumulation in tubers, you can save colors and flavors not available in grocery stores. Examples are ‘Russian Banana’, ‘Yellow Finns’ and ‘Ruby Crescent Fingerling’.
Our dry Colorado climate is excellent for seed saving. Keep seeds in a cool place. Be sure to label with name, variety and date collected.
Share your seed saving tips and experiences with us.
Photo credit: Removing seed from ripe tomato, Flowering lettuce will produce seed - both Carl Wilson
Thursday, October 7, 2010
Reflecting on garden efforts
Warm weather lingers but plants are responding to signals that days are shortening. Summer squash plants that used to produce a fruit a day are down to one or two per week - this in spite of the record twenty-five days above 80 degrees F in September. Decisions will have to be made soon about removing declining plants and chopping them to compost.
It’s a good time to assess what worked and what didn’t this growing season. What varieties did well and which ones performed poorly? I am pleased with this yellow zucchini variety, ‘Soleil’ (photo left). It produced well and fruit had a good flavor in addition to a very bright yellow skin.
What about diseases and insects? The container tomato pictured maintained pale leaf color throughout the season. Leaves were small and stiffly held. Fruit were extremely slow to develop, ripen and lacked flavor. All these symptoms point to a virus that sapped the energy from the plant leaving it weakened. The lesson here is to avoid planting transplants that look off-color from the start or replace them early in the season as soon as unusual growth is noticed.
Some problems are hard to prevent. Psyllids were widespread this year on potatoes and tomatoes. Not all gardens were infested with these insects but enough were that it can be characterized as a severe psyllid year. Fortunately psyllids don’t overwinter here (except indoors) so next year insects might not find their way from southern areas resulting in no or little infestation. Both potatoes (affected foliage yellow in photo) and tomatoes (photo right with purple veins in leaves) are typically affected. See earlier psyllid article for more.
What did you learn from your vegetable garden this year?
Photo credit: 'Soleil' zucchini, Virus disease on tomato, Psyllid yellows on potato, Purple veins of tomato with psyllids - all Carl Wilson
Thursday, September 30, 2010
Colorado’s fickle climate
A few weather observations this week. The Colorado climate never ceases to amaze me. September 19 and 20 had record highs for those dates, 96 and 94 degrees F respectively. Then on September 23, some low lying areas in Denver and open space areas on the outskirts had light frosts overnight. The following weekend another 90 degree F record high was set on the 26th. Be ready - temperatures can change on a dime or so it seems.
A visiting gardener told me this week that his cucumbers and other frost sensitive garden vegetables froze on Labor Day, September 6, during the last cold snap. His garden is in a low lying area in south-central Denver, not even on the outskirts of town. Clearing nights with radiational frosts combined with air drainage into low lying areas can catch plants earlier than most of the surrounding area.
As they say in real estate – location, location, location. This savvy gardener hedged his bets by cultivating plots in several community gardens that were unaffected. These low lying areas are bad bets for growing fruit trees.
It’s a good time to think about frost protection and season extenders now that fall is officially here. I admit to being biased but one of the best discussions I’ve seen on these topics is our CSU Extension CMG Garden Note 722, titled Frost protection and Extending the Growing Season. Review it for a refresher on how measures such as plant covers are used best
Diagram from CSU Extension CMG Garden Note 722.
Thursday, September 23, 2010
Harvesting and storing pumpkins
Harvesting pumpkins seems pretty easy – wait until orange and detach from vine. It is and isn’t that easy depending on how long you want to store them.
Like many parts of the Upper Midwest, we seem to be having an early harvest season this year. Pumpkins and fall squash should be harvested when skin is tough and doesn’t yield to gentle fingernail pressure. Stems should be dry.
Research shows jack-o-lantern size pumpkins reach full color 45 days after fruit set and stems harden in 20-35 days after fruit set. This is for ideal growing conditions and may take longer if there is shade, drought, disease or other stresses.
Know that conditions both before and after harvest affect storage life. Vines that are healthy up to harvest make for a longer keeping pumpkin. Likewise, favorable storage conditions after harvest make a difference too.
Cut the stem with hand pruners to preserve stem health. Solid stems provide an effective barrier to rot. Use care in moving pumpkins to avoid nicks, scrapes and other mechanical injury. Move when the surface of the fruit is dry to be able to get a firm grip on fruit among other reasons. They keep better if harvested before frost and sustained periods under 40 degrees F.
Store in a shaded, dry area with good ventilation. The best storage temperature is 50 to 60 degrees F. This temperature is likely difficult for most people to achieve, particularly with hot weather lingering late into September this season.
Healthy fruit that is harvested and stored under favorable conditions can last up to 6 months. If you want fruit to last until Halloween, that is a reasonable goal. Storage until Thanksgiving will take a little more attention to each step of the growing and harvesting process.
Photo credit: Standard and flat French pumpkin types – both Carl Wilson
Thursday, September 16, 2010
When are watermelons ready?
I never used to be a fan of growing watermelons in northern climates. Years ago available varieties never reached maturity and tasted bland or green. Newer short season watermelons have changed all that. Varieties such as ‘Sugar Baby’ (75 days), ‘Shiny Boy’ (75 days), ‘Yellow Doll' (76 days), ‘Blacktail Mountain’ (70 days) and others have a reasonable shot at maturing in our short growing season. They should be transplanted like many warm-season vegetables so seed your own indoors in spring or purchase transplants.
A frequent question I receive is how to tell when watermelons are ripe. You can gently roll the melon over to check for a yellow groundspot. Another clue is to look for the curled tendril below the vine attachment. Green tendrils indicate a green melon while a shriveled, brown tendril indicates maturity.
Then there is the sounding method. A knuckle tap that yields a dull sound indicates under-ripe. If it sounds hollow, the watermelon is ripe for eating. A soft sound indicates over-ripe. This method also works in the produce market.
Tapping knuckles takes on a whole new meaning for cool vegetable gardeners.
Photo credit: Watermelon on vine – Carl Wilson, ‘Shiny Boy’ watermelon – 2010 All America Selections winner.
Thursday, September 9, 2010
Plan now to ripen tomatoes
The first week of September brought four nights with temperatures in the forties to Denver. Tuesday morning following the Labor Day holiday I was surprised to find frost on the grass in the open space area near me in Southwest Denver (no frost in the residential area nearby though). Seasons change quickly on the Front Range making this a good time to plan to get the most from summer tomato growing efforts.
Newly setting tomato blossoms, small and very green fruit won’t mature in the remaining growing season and are best pruned off. New, vigorous shoots also may be clipped back. Don’t remove an excessive amount of leaves as these supply nutrients to fruit. Light pruning directs plant energy to fruit that has a chance of maturing.
As late September approaches, gardeners often try to extend the life of their plants by covering with cloth or plastic. Covering plants works well for nearly red tomatoes, but not as well for mature green ones. Research shows that chilling injury on green fruit occurs at temperatures of 50 degrees and decay losses are heavy on fruit exposed to 40 degrees F. Red ones well on their way to ripening better tolerate colder temperatures.
Newly setting tomato blossoms, small and very green fruit won’t mature in the remaining growing season and are best pruned off. New, vigorous shoots also may be clipped back. Don’t remove an excessive amount of leaves as these supply nutrients to fruit. Light pruning directs plant energy to fruit that has a chance of maturing.
When fruit set is heavy, it can work against gardeners. Ripening numerous fruit takes a lot of energy from the leaves and tends to delay the whole crop turning red. If there are only a few weeks before frost and fruit is not ripening, try removing some of the mature green fruit to ripen what’s left on the vine.
Cooler September temperatures help fruit to ripen because the red tomato pigments, lycopene and carotene, are not produced above 85 degrees F.
As late September approaches, gardeners often try to extend the life of their plants by covering with cloth or plastic. Covering plants works well for nearly red tomatoes, but not as well for mature green ones. Research shows that chilling injury on green fruit occurs at temperatures of 50 degrees and decay losses are heavy on fruit exposed to 40 degrees F. Red ones well on their way to ripening better tolerate colder temperatures.
Before frost hits and plants go down, pick and bring fruit indoors to ripen. Extended exposure to cool temperatures interferes with ripening and flavor development. Clip fruit to leave a very short stem piece but not so long to punch holes in other tomatoes. Stems ripped out of fruit will open them to decay.
Eliminate young, green fruit, as research shows it’s more likely to spoil than ripen and never develops the flavor consumers want anyway. Mature green fruit will develop good flavor. Mature green tomatoes are well sized and have turned light green to white.
Sort and store fruit in groups that will ripen at similar speeds. Fruit may be “mature green”, "turning" with a tinge of pink to "pink" with 30 to 60 percent color showing, "light red" with 60 to 90 percent color present, and others "fully red" but not soft.
Store ripening tomatoes at 55 to 70 degrees F. Refrigerator temperatures of 40 degrees are too cold to ripen mature green tomatoes and are colder than desired for ripe ones. Ripening enzymes are destroyed by cold temperatures whether in the garden or in a refrigerator.
Ripen tomatoes in well-ventilated, open cardboard boxes at room temperature checking them every few days to eliminate those that may have spoiled. Mature green tomatoes will ripen in 14 days at 70 degrees F.
Cold weather and frosts can come in late September before typical October killing frosts arrive. Plan now to realize the biggest harvest from your vegetable garden.
Photo credit: Roma tomato with mature green fruit, Staked tomatoes, Tomato harvest in box - all Carl Wilson
Wednesday, September 1, 2010
Harvesting and ripening pears
The best way to tell when fruit is ready to harvest is often the simple taste test. For backyard gardeners not concerned with shipping fruit, this is good advice for apples, peaches, plums and grapes.
Pears are the exception. “Tree ripened” pears will not be satisfactory. Pears left on trees ripen from the inside out and stone cells fully develop making for “gritty” eating. When the outside is ready, the inside is often brown mush. If picked slightly immature, they ripen uniformly with a smoother flesh consistency OFF the tree.
Harvest most European pears such as ’D'Anjou’ (photo above) and 'Bartlett' when they easily detach from trees. Tilt them upward to horizontal and they come loose when ready for harvest. ‘Bosc’ pears (photo right) are always difficult to separate from the tree and stems may have to be clipped with a sharp pruner. All pears should feel hard when picked.
In looking for signals for when to harvest, disregard the red blush on varieties that develop it such as D'Anjou (photo above). The ground color of the pear skin will change to more closely resemble the mature pear of that variety. With Bartlett, D’Anjou and other yellow pear varieties, skin becomes a lighter green.
Pears then have to be ripened indoors. Some pears such as D'Anjou require cold storage before ripening. Bartlett does not but 2 days of chilling may help even ripening. D’Anjou and Bosc should be chilled for 2 weeks in the refrigerator away from apples, onions, potatoes and other fruits and vegetables. Pears in grocery stores and those shipped by specialty mail order companies have already been given their chilling treatment.
Ripen at room temperature, 65 to 75 degrees F. Warm temperatures of 85 degrees F or higher interfere with ripening. Bartlett pears generally ripen in 5 days, Bosc in 7 days and D’Anjou in 7 to 10 days. The longer pears are chilled, the shorter the ripening time when removed from cold storage.
Pears naturally produce ethylene gas inside the fruit as they ripen. You can shorten ripening time by placing pears in a closed paper bag with a ripe banana or apple, both of which produce ethylene to speed ripening.
Pears are ready to eat when the flesh just below the stem yields evenly to gentle pressure.
Photo credit: d'Anjou pears, Bosc pears - both Carl Wilson
Thursday, August 26, 2010
Tomato fruit cracking
Some tomato fruit are cracking now that we’re in the midst of tomato ripening season. Stem end cracks can be of two kinds but are both due to the same causes. You may see cracks that spread outward from the stem (radial cracks see photo right) or concentric cracks in circles with the stem in the center (photo left).
Cracks generally appear as fruit is maturing (mature green or coloring), rarely when small. The earlier fruit cracks, the deeper cracks become.
Growth cracks can be traced to rapid changes in environmental conditions, either moisture, temperature or both acting together. Dry weather followed by heavy rains is known to cause cracking in many tomato varieties. The strength and ability of the skin to stretch vary by variety and thus some varieties are marketed as “crack resistant.” They are worth a try if you have had problems.
High nitrogen fertilization stimulating rapid growth is also a cause for cracking. Slow release granules, organic sources or low strength fertilizers (soluble types in water) should be considered for fertilizing now.
Cherry type tomatoes are problematic for growth cracking. They are so small that when cracks occur they often run down most of the fruit (photo right - click to enlarge). Harvesting fruit before it turns dead ripe eliminates the possibility that further growth on the vine will result in cracks.
Do everything you can to even out the water to avoid growth cracks; irrigate not too much and not too little. Mulch soil to prevent rapid summer evaporation and dry down. The cherry tomatoes pictured are growing in a large container where it is always difficult to maintain even moisture in spite of daily watering.
Although gardeners can modify fertilization and watering practices, they can’t change the temperature. Temperature fluctuations and our dry air that toughens skins are probably big reasons we have cracking problems. Our average day-night temperature fluctuation for August has been 29 degrees F. That’s a wide range of temperature for a plant to handle.
Photo credit: Radial cracking - Carl Wilson, Concentric cracking - Iowa State University Extension, Cherry tomato fruit radial cracking - Carl Wilson
Thursday, August 19, 2010
Telling powdery mildew by its spots
Powdery mildew can be a chronic late summer and fall disease in the vegetable garden. I’ve found that some people mistake the normal color variation in leaves for the disease. Many squash have silver-white blotches like spots on a leopard. See photo of the normal blotches on the leaves of the All America Selections winner, ‘Papaya Pear’ squash right.
When squash becomes infected with powdery mildew, the dusty flour appearance of the disease looks more irregular and is on the surface instead of being part of the leaf. See photo left. Note that the disease appears on the upper leaf surface, not leaf undersides. Infected leaves can turn yellow, become distorted and fall prematurely (photo below right).
The severity of the disease depends on many things including plant variety, age of the plant, health status of the plant and weather conditions. Young, succulent growth is more susceptible than older plant tissue. Avoid late summer applications of nitrogen fertilizer.
Powdery mildews tend to be severe in warm, dry climates. High relative humidity is needed for fungal spores to germinate once they land on leaf surfaces. Shaded sites with poor air circulation favor disease. This is another reason to grow in open, full sun locations. These sites promote plant health by having ample sunlight for photosynthesis. They also ensure that humidity around leaves is quickly dispersed by adequate air movement.
Ground applied (drip) watering rather than overhead sprinkling also helps humidity control. Water in the morning rather than evening to take advantage of sunshine that quickly dries leaves.
If these cultural controls are not adequate, supplement with chemical applications of potassium bicarbonate (preventive) and neem oil (eradicant after infection). Read all label instructions and make sure the product you purchase is labeled for use on squash.
Photo credit: Healthy ‘Papaya Pear’ squash leaf, Powdery mildew infestation on squash leaves, Severe infestation and leaf yellowing – all three Carl Wilson
Wednesday, August 11, 2010
Peaches – what a haul
This is one of those years when we are reminded what peaches can really do. We only see peach fruit production like this in maybe one year out of five on the Front Range.
Because we don’t see peach fruit every year due to blossoms freezing in the spring, people may not know how to handle or prune trees. Excessive fruit loads will commonly break limbs in heavy bearing years. Propping up limbs (photo right) is a poor solution because limbs rub and damage bark when moved in the wind.
Preventing broken limbs goes back to June with fruit thinning, removing excess fruit when they are thumbnail size to leave only one fruit every six inches on limbs. This is what commercial peach growers commonly do and results in larger and sweeter fruit (fewer “packages” for the tree to sweeten up).
What can you do when limbs break? Not much, unfortunately but use a pruning saw to remove jagged edges and smooth the branch tear on trees. Basic pruning to wide angled scaffold limbs helps. Limbs at wide angles to the main trunk are much stronger than narrow angles.
As for fruiting wood, peaches produce only on one year-old twigs. The branches producing fruit this year should be removed in winter. Peaches are pruned hard removing the older, thicker branches to leave productive, young twigs (this year’s growth). Trees that aren’t pruned rapidly become dense and produce poorly. Light reaching producing branches is necessary to grow fruit.
For more details on peach pruning, see this post. Mark your mental calendar now to prune this winter!
Photo credit: Weighted down peach branch, Propped branch, Loaded peach tree – all Carl Wilson
Thursday, August 5, 2010
It's raspberry time
In spite of nearly every tree fruit escaping spring blossom-killing freezes and bearing well this year, small fruit remain more certain to produce yearly crops. Red and yellow raspberries are the most reliable. Black raspberries are not widely recommended because of lack of cold hardiness; however roots do survive to try producing fruit again in two years time. This may change as better adapted and more reliable black raspberry varieties are introduced.
If several red and yellow raspberry varieties are planted, you can realize a harvest from midseason to frost. Summer-bearing Nova, Killarney and Boyne produced crops in July and now the fall-bearing types Anne( yellow), Autumn Britten (photo above right) and old standby, Heritage are ripening and can produce up till frost.
Raspberries are naturally a biennial, growing canes one year and producing fruit on those overwintered canes the summer of the second year. The problem comes with overwintering canes. In most parts of the Front Range this usually isn’t a problem. With summer bearing types, you wait until the canes are finished fruiting in the summer of their second year to remove them.
Post WWII breeding produced the fall-bearing types that grow canes and produce fruit in the same season, With no canes to overwinter, harvests are more assured and pruning is easier since they are simply cut to the ground after the fall harvest.
What are the problems with raspberries? Homeowners often ask why their raspberries that once produced well fail to bear a crop anymore. Raspberries will last about ten years and bear best in the first five years of that period. After that accumulated viruses carried in by aphids decrease production. The planting should be removed and new stock planted. Don't get plants from fellow gardeners because of viruses. Buy virus-free stock from reputable nurseries. Plant in new soil that has been amended with organic matter and drainage ensured often by building a raised soil bed.
More raspberry information is available in the CSU Extension raspberry fact sheet. Give them a try.
Photo credit: Autumn Britten fruit, Raspberry canes, Carl Wilson
Wednesday, July 28, 2010
More butterflies than usual?
Is it just me or are many of you seeing more butterflies than average this summer? I also think I’m seeing fewer European paper wasps, a major predator of butterfly larvae. Perhaps that’s why.
The adults and larvae of butterflies require different food plants. The larvae of cabbage worm eat cabbage family plants (photo of damaged kale left, larva photo right). The white adult butterflies gather nectar from a variety of flowering plants (adult on thistle below left).
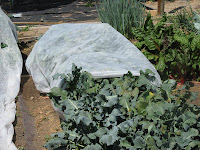
Control of cabbage worm includes the use of the natural bacteria Bacillus thuringiensis Kurstaki strain. See the CSU Extension fact sheet on Bacillus thuringiensis for advantages and disadvantages of using this natural control. Another idea is to exclude the adult butterfly from laying eggs on plants with the use of a floating row cover (photo right).
A colorful butterfly plentiful throughout the Denver area this season is the Two-tailed swallowtail. Adults (photo left) feed on geranium, thistle and milkweed plus other flowers, larvae (photo right) consume green ash and chokecherry. Gardeners curious about the yellow butterflies flying by can now rest easy knowing the larvae are not eating their vegetables.
To learn names, see photos, and find out the food plants for the adult and larval stages of common Colorado butterflies, see the CSU Extension fact sheet on butterflies in the garden.
Photo credit:
Cabbage worm damage to kale, Carl Wilson
Cabbage worm larva, Whitney Cranshaw, CSU Extension
Adult cabbage worm butterfly, Davud Cappaert, Michigan State University
Row cover, Carl Wilson
Two-tailed swallowtail adult, CSU Extension
Two-tailed swallowtail larva, Whitney Cranshaw, CSU Extension
Thursday, July 15, 2010
Seed now and watch for cutworms
Now is the time to plant seeds of late summer and fall crops where earlier ones have been harvested. Chose 60 day or less crops (carrots, beets, bush beans, radishes, Swiss chard, New Zealand spinach) or ones that like to mature in cooler temperatures (lettuce, peas, spinach, kale, collards, Asian greens). Note that a nice option with greens is that they can be harvested at almost any stage of maturity in the event of a short growing season.
With a temperature in the nineties F, small seed will be hard to germinate Use seed germination fabric and water lightly but frequently.
One seed germination hazard that some people think is a spring but not summer pest in cutworms. Cutworms are caterpillars that cut and kill tender seedlings round the soil line.
The notorious "miller moth" that people in our area recognize in the adult flying form (photo above left) is Army cutworm in its larval caterpillar stage. (See above right photo).
Note that there are also climbing cutworms as the person who brought chomped basil leaves in for diagnosis today discovered. Beet armyworm (see photos adult left and larva right) is a climber active in mid to late summer that chews on a very wide variety of plants. Variegated cutworm is another (photos below).
Cutworms typically feed at night and hide in soil cracks, under dirt clods or seek other cover during the day. If you are going to find them, you have to go out after dark with a flashlight.
Cutworms are preyed upon by ground beetles, rove beetles, spiders, tachinid flies, parasitic wasps and other garden insects as well as toads and snakes. If natural enemies aren’t providing sufficient control, consider your weed situation. Cutworm moths are attracted to weeds for egg-laying.
Promote rapid seedling growth with good cultural practices (right amounts of water, loose soil, proper planting times, etc.) and use transplants. Transplants and older plants aren’t as tender and less likely to be damaged at the soil line. Note that climbing-type cutworms will find the tender leaves on top.
Protect tender transplants and seedlings with cutworm collars (cardboard, foil) or milk carton rings. Insecticide baits are available for cutworms. They are more targeted than whole-plant sprays which may kill beneficial insects as well as pests. Note that B.t. (Bacillus thuringiensis) natural insecticide is generally ineffective against cutworms.
Photo credit: Miller moth Whitney Cranshaw, CSU Extension; Army cutworm larva Frank Peairs, CSU Extension; Beet armyworm adult Merle Shepard & Gerald Carner & P.A.C. Ooi; Beet armyworm larva Frank Peairs, CSU Extension; Variegated cutworm adult Ian Kimber; Variegated cutworm larva Charles Olsen, USDA APHIS PPQ.
With a temperature in the nineties F, small seed will be hard to germinate Use seed germination fabric and water lightly but frequently.
One seed germination hazard that some people think is a spring but not summer pest in cutworms. Cutworms are caterpillars that cut and kill tender seedlings round the soil line.
The notorious "miller moth" that people in our area recognize in the adult flying form (photo above left) is Army cutworm in its larval caterpillar stage. (See above right photo).
Note that there are also climbing cutworms as the person who brought chomped basil leaves in for diagnosis today discovered. Beet armyworm (see photos adult left and larva right) is a climber active in mid to late summer that chews on a very wide variety of plants. Variegated cutworm is another (photos below).
Cutworms typically feed at night and hide in soil cracks, under dirt clods or seek other cover during the day. If you are going to find them, you have to go out after dark with a flashlight.
Cutworms are preyed upon by ground beetles, rove beetles, spiders, tachinid flies, parasitic wasps and other garden insects as well as toads and snakes. If natural enemies aren’t providing sufficient control, consider your weed situation. Cutworm moths are attracted to weeds for egg-laying.
Promote rapid seedling growth with good cultural practices (right amounts of water, loose soil, proper planting times, etc.) and use transplants. Transplants and older plants aren’t as tender and less likely to be damaged at the soil line. Note that climbing-type cutworms will find the tender leaves on top.
Protect tender transplants and seedlings with cutworm collars (cardboard, foil) or milk carton rings. Insecticide baits are available for cutworms. They are more targeted than whole-plant sprays which may kill beneficial insects as well as pests. Note that B.t. (Bacillus thuringiensis) natural insecticide is generally ineffective against cutworms.
Photo credit: Miller moth Whitney Cranshaw, CSU Extension; Army cutworm larva Frank Peairs, CSU Extension; Beet armyworm adult Merle Shepard & Gerald Carner & P.A.C. Ooi; Beet armyworm larva Frank Peairs, CSU Extension; Variegated cutworm adult Ian Kimber; Variegated cutworm larva Charles Olsen, USDA APHIS PPQ.