Friday, December 30, 2011

Grow on! - Hairy vetch

It's nice to see something green in the vegetable plots in winter and hairy vetch, Vicia villosa, performs well as a cover crop. It is is a high N producer, vigorous grower, very drought tolerant, prospers in low fertility and a wide range of soil conditions, and is winter hardy to zone 4 with snow cover.

One of the best things about fall planted hairy vetch is that it provides improvements in crop yields greater than the nitrogen added by it's symbiotic nitrogen-fixing bacteria alone. This may be due to root penetration that leads to better vegetable root development, physical soil improvement that allows a better air-moisture balance for crop roots in soil, improved soil biological activity or other reasons.

Note that hairy vetch doesn't build up long-term soil organic matter. It is a essentially a succulent plant that has a relatively low carbon to nitrogen ratio in the range of 8:1 to 15:1. Most benefits are realized by the first vegetable crop that follows in spring. For this reason it is often interplanted with winter rye, Secale cereale, that has a higher C:N ratio (ranging from 25:1 to 55:1) and thus breaks down more slowly. The combination planting results in some of the best of both worlds - N contribution plus short and longer term organic matter increase.

Hairy vetch growth is almost non-existent in mid-winter but will increase with lengthening days. Mow and turn it under at 25% bloom when N contribution will be maximized.

Note that freezing temperatures under 5 degree F can cause some winter kill if there is no snow cover. Temperatures in this range occurred along some parts of the Front Range December 5 and 6 and some damage may be seen. This is another reason to plant with hardy winter rye so an adequate spring yield of biomass can be gained. Next post will highlight workhorse winter rye as a cover crop.

Photo credit: Hairy vetch closeup - Carl Wilson

Friday, October 7, 2011

Season Endings and Beginnings

Vegetable Endings
With night temperatures predicted to drop into the thirties F this coming weekend, it's time to harvest what remains of tomatoes, peppers, eggplants and many other fruiting vegetables. Thirty degree temperatures are flavor killers for tomatoes anyway so using ripe fruit and ripening mature green or pink breaker fruit indoors is preferable.

Cover Crop Beginnings
Clearing plant refuse off the growing area now has another advantage. Mid-October is a good time to plant winter cover crops for soil improvement. Maintaining desirable levels of both organic matter and nitrogen in your soil is important for growing vegetables. Nonlegume cover crops help with organic matter and legumes can add both.

One common cover crop planted in our area is winter rye but there is a lot of confusion about what that is. Winter rye is cereal rye, Secale cereale, the same rye used for grain. Annual or Italian ryegrass, Lolium multiflorum, can be used as a cover crop in certain circumstances but winterkills in cold, dry Front Range conditions. Annual rye should be sown in early fall, so it's now late to plant.

Winter rye on the other hand is one of the hardiest of cereals and can be seeded later in fall. Growth is rapid in cool fall weather and its quick-growing, fibrous roots hold soil and leftover fertilizer well. It is also good at suppressing weeds.

Rye can also be sown with legumes in fall. Hairy vetch, Vicia villosa, is one of the most popular. It's winter hardy to zone 4 and can work in zone 3 with snow cover. It grows slowly but root growth continues over winter and vine growth quickens with arrival of spring. It tolerates poor soils (including sandy ones) and delivers a heavy contribution of nitrogen compliments of it's symbiotic nitrogen fixing bacteria.

A type of field pea (Pisum sativum subsp. arvense), Austrian winter pea, can also be used as a winter legume. It is not as cold hardy as hairy vetch and should be seeded in early fall. Plant it with a winter grain such as rye to protect pea roots and maximize winter survival. It prospers best with some winter moisture.

A rule of thumb is to plan for at least a month in spring after turning under cover crops to allow them to decompose before planting vegetables.

Photo credit: Tomato harvest and Rye/Hairy vetch seed - both Carl Wilson

Friday, September 30, 2011

Other root vegetables - parsnip

Parsnips are just now coming into their own with no need to worry about rushing to harvest before frost. In fact freezing actually improves root quality so bring on the cold weather. Roots can be dug as needed or stored moist (vented plastic bags) in the refigerator for a couple weeks so starches are converted to sugar for roots to have a better flavor.

Parsnips are grown from seed planted in early spring (April). 'Harris Model' and 'All American' are two standard varieties but most should grow well here. Fresh seed is a must as old seed germinates poorly. Like their parsley family cousin, carrots, seed takes 2 to 3 weeks to germinate. Seed is often over-planted because of poor germination and then seedlings thinned to 4-6 inches between plants.

This is a full season crop averaging 110 to 120 days (4 months) to mature. A deep, loose soil is a must just like carrots. Once top foliage grows to cover over, most weeds should cease being a problem. Supply steady moisture to avoid root disorders but note overwatering can cause forking and hairy roots. Moisture fluctuations produce cracking. Organic mulches (grass clippings or straw) in summer are helpful for weed and moisture control.

Parsnips are a different root vegetable to try for a variation from carrots and beets.

Photo credit: Parsnips in raised bed, harvested parsnip roots - both Carl Wilson

Wednesday, September 21, 2011

Seasonal roundup

Powdery mildew
With cooler weather comes a decline in production of summer squash and increase in powdery mildew on both summer and winter squash. Hopefully many fruit have been harvested or are near-ready for harvest. Photo is of powdery mildew on Kabocha winter squash. Powdery mildew decreases photosynthesis and weakens plants affecting nutrients available to form fruit and their flavor.

Control is mostly preventive through a full sun location and good air circulation. Water at the soil level rather than on leaves. Potassium bicarbonate (Remedy) can be used as a preventive or in the very early stages of infection. Some fungicides such as neem (Greenlight Powdery Mildew Killer) and horticultural oil do have some effect on killing existing infections.

Cabbage aphids
They're back......! Cabbage aphids thrive in cool fall weather and can be a real problem on savoy cabbage and Brussel sprouts (photo). They penetrate in and among the curled leaves and where sprouts set down in the leaf axil. Their feeding distorts and contaminates the harvest. Cabbage aphids overwinter on wild mustard family plants so weed control near the growing area is important.

Control is tough because of their waxy covering that makes these gray-green aphids appear bluish-white. Lady beetles don't like them because of the wax. Syrphid flies are another predator that may help. Unfortunately the activity of predators decreases late in the season when short days and cool temperatures reduce the activity of natural enemies. Parasitic wasps aid the cause but parasitized aphids tend to tightly stick to foliage compounding contamination problems.

Botanicals such as azadirachtin insect growth regulator, neem oil or pyrethins can be tried as well as horticultural oils when insect population thresholds warrant applications.

Destroy crop residue after harvest to minimize overwintering populations.

Photo credit: Powdery mildew on Kabocha squash, Cabbage aphid on Brussel sprouts - both Carl Wilson

Thursday, September 8, 2011

The big cool down

In our semiarid climate, it's always amazing how fast the weather can cool down as the days shorten. Some folks I talked with the last week of August were despairing that it would cool down anytime soon. Then, wham. The first of September was officially 96 degrees F in Denver with a 68 degree low. By the 3rd it was 71 degrees with a 48 degree low.

The losers in the vegetable garden are the warm season vegetables. Tomato fruit have slowed ripening and summer squash are not producing fruit seemingly overnight. The winners are the cool season vegetables for those who had the space and foresight to seed them mid-summer (July).

Nights under 55 degrees F will cause tomatoes to shut down for a few days to a week, especially with nighttime temperatures reaching 41 degrees F, the official low on Sept 4th. Mature fruit on these plants will eventually ripen but the cold affects flavor. New and young fruit tend to stop development.

This is the time to think about season extension growing tunnels if you want to keep these crops producing through the fall. When temperatures drop 14 degrees below the desired 55 degree nighttime, tunnels almost have to be plastic on hoops as row cover fabric only provides a few degrees of difference.

Even though these temperatures are ten degrees below normal and we will likely still see some warm days, more nights in the forties are predicted over the next week. The cool season leafy vegetables like lettuce, spinach and kale are loving the temperature change to cool and don't need season extenders in early fall.

Photo credit: Two types of kale and lettuce - Carl Wilson

Thursday, September 1, 2011

Beet leafminer

Beet or spinach leafminer is generally more of a cosmetic pest on beets grown for roots. For greens, it is another story.

The leafminer is the larva of a 1/4" gray fly with black hairs. Eggs are laid on leaves or several plants including beets, spinach, chard and weeds such as lambsquarters. Small maggots emerge and tunnel between leaf surfaces. The narrow tunnels merge into pale blotches (photo) and damaged leaves are distorted. Maggots drop to the ground to pupate and change into adult flies.

Leafminer emerges in April and May and several generations occur each year. They are active now on spinach and beets planted mid-summer for fall harvest and particularly common in gardens where one or the other crop is continuously grown.


Eggs are distinctive (photo) because they are white and laid in small masses. One of the simplest means of control is to check for egg masses and hand crush. Pinch leaves to kill karvae inside when mining is observed. Leaves with actively growing larvae also can be picked and destroyed or bagged for trash to be taken off site. Leaving picked leaves on the ground allows leafminer to complete its lifecycle.

The use of floating row cover fabric can help if put in place before flies emerge and the crop is in a different garden area than the previous year. You don't want flies emerging from the soil under rowcover with their favorite food handy and protected.

Control weeds around the garden and rotate crops for control.

Photo credit: Leafminer blotches on beet leaves (Carl Wilson), Leafminer eggs (CSU Extension)

Monday, August 29, 2011

Banner year for tomatoes

Although many people on the Front Range may be tired of summer heat, there is always a plus side. One is that it has been a banner summer for productive tomatoes. This is due to hot days but more so to warm nights. Many nights have been in the sixties degrees F instead of fifties as is so often the case in Front Range summers.

After a cool May and transplanting better delayed until the first week in June, some people were despairing of realizing a tomato yield due to a late start. This has obviously resolved itself and many varieties are showing good performance.

In full sun, 80 day heirloom 'Cherokee Purple' in our garden is doing as well as 73 day modern 'Big Beef'.

Three short season varieites tried this year are of note. 70 day 'Azoychka' from Russia (photo above right) is a mild acid, yellow fruited type that is producing well. A 68 day pink Asian type, 'Zhefen Short' (photo left) from China is yielding a good crop of nice plump fruit. The heirloom 75 day 'Black Cherry' (photo right) is also bearing nicely.

Shorter season types of 70 days or less including 'Early Girl' (62 days) and heirloom 'Stupice' (52 days) from Czechoslovakia (photo right) are still good bets especially if you have only part day sun or a cooler location. They bear early and can perform well in summers that don't have warm nights. Both have produced well for us this year.

Harvest from the demonstration garden at our Denver office is donated to feed the hungry. Consider donating your excess bounty to a local food pantry or soup kitchen.

Photo credit: 'Azoychka', 'Zhefen Short', 'Black Cherry', 'Stupice' tomatoes - All Carl Wilson.

Monday, August 22, 2011

Harvesting fall squash

I've received several questions about when fall squash are ready for harvest. Fall or winter squash should be harvested when fully mature which is more typically in September than August. Immature fruit have a watery flesh, don't store well and if harvested are eaten like summer squash. Not all of them will taste good when eaten immature, hubbard and golden acorn reputedly are O.K.

As fall squash matures, the flesh becomes drier and sugars develop. Both changes contribute to storing quality. Some types will store up to 3 or 4 months when harvested at the right time and stored under ideal conditions (dry and 55 degrees F). One inch of neck should be left on the fruit and it should be hard and dry when harvested.

General signs of maturity are skin that can't be easily dented with a thumbnail, color that is true to mature type, and reaching the proper number of days to harvest.

Certain types of squash have other things to look for. On acorns, the groundspot where fruit touches the ground will change from yellow to orange. Carefully turn fruit over to check being careful not to detach from the stem in case you have to roll it back to let it ripen further (photo acorn above left - still yellow: immature). On golden acorns, the groundspot doesn't show like it does on green acorns. Yellow skin should turn a deep golden yellow at maturity on these.

Butternut squash are ripe when vine growth stops and skin color changes from a light whitish tan to a deep tan (photos below - left photo immature, photo right fruit medium mature and still needs time to turn a deep tan).


Vegetable spaghetti squash are mature when they turn from a light yellow to golden yellow (photos below). Buttercup squash are ripe when dark green fruit are 5 to 6 inches across and stop growth. These are the most common varieties grown by home gardeners because their approximately 80 to 85 days to harvest makes them reliable in our climate.


Blue hubbard (blue-gray) and Boston marrow (reddish-orange) are occasionally grown. They take a full season, 110 and 120 days respectively, and are mature when vines die down.


Photo credit: Rotating acorn to check maturity, Butternut immature and medium mature, Vegetable spaghetti immature and mature - All Carl Wilson

Friday, August 12, 2011

Squash viruses

Several viruses affect squash including squash mosaic virus and cucumber mosaic virus. Aphids transmit the viruses from infected plants that can include weeds such as common lambsquarters, kochia and others.

You may discover viruses as we did recently in our yellow zucchini planting by spotting one plant with light green, mottled leaves in a sea of healthy. dark green leafed plants. (Click photo to enlarge). Leaves often have a mosaic pattern and may be distorted, have deep lobes, or appear string like and thin.


Fruit can appear small, deformed, mottled, have ring spots or exhibit color breaks and may develop warts. In our planting the affected fruit (photo left) look quite different than normal yellow zucchini (photo right). The different viruses produce different symptoms depending on the stage in which the plant is affected and several viruses can affect the same plant.

Do plant virus resistant or tolerant varieties when available. Purchase seed from a reputable supplier and use care in saving seed. Manage aphids to keep numbers low. As soon as diseases appears, remove plants like we did. Viruses can be mechanically transmitted so wash hands and tools before working with healthy plants. Control nearby weeds that may harbor viruses. There are no pesticides to control viruses.

Photo credit: Virus mottled leaf plant stands out, Virus distorted fruit, Normal yellow zucchini fruit - all Carl Wilson

Monday, August 8, 2011

Tomato pruning debate

I've had several conversations about removing tomato suckers with people recently. Suckers for those who don't know are the shoots that grow between the tomato leaf branch and the main stem. If you choose to remove them, do so when they are young rather than letting a large shoot develop. The question is should you remove suckers or not?

There certainly are some pluses to this growing technique: easier to train on a support whether stake or cage, ability to plant more plants closer together and easier access to harvest fruit. See photo of tomato in a pot with slim form produced by having all suckers removed. The alternative is not pruning which usually is done by letting tomatoes run on the ground. With large, 3 to 4 feet wide, sturdy cages, not pruning is also often practiced.

One of the disadvantages of removing suckers is exposing fruit by having less leaf cover. This can increase the chances of sunscald (photo). Sucker removal carried to the extreme probably limits the photosynthetic capacity of the plant particularly with some less robust tomato varieties.

You also can use some of both techniques along the way. Removing suckers at first and then slacking off and letting them grow later produces more leaf cover to protect fruit from sunscald. What works for you?

Whether you are pruning or not, you should have fruit beginning to ripen. Nighttime temperatures are already beginning to drop into the fifties along the Front Range. The August transition to fall will also see more daytime temperatures in the eighties. For warm weather loving tomatoes, fruit development should be well along at this point in the growing season.

Photo credit: Tomato plant with suckers removed, Sunscald on green tomato fruit - both Carl Wilson

Tuesday, July 26, 2011

Seed or transplant for Fall

Now is the time to finish seeding or transplanting 50 to 60 day crops to mature in Fall. We just finished installing kale, red and golden beet transplants (photos). Even though it's hot now, these crops and others including lettuce will grow and be of good quality as they mature in cooler fall temperatures.

Planting a second crop where spring crops leave "vacancies" increase yields from a given square footage of soil during a growing season. Rotate crops and don't plant same family plants such as kale following cabbage. We planted beets following lettuce and cabbage, and kale following beets.

This higher demand on garden soil is equivalent of a full season crop such as tomato or potato. It requires adequate organic matter and fertility to meet the needs of the second crop so do be sure your soil is prepared to handle succession planting.

Photo credit: Transplanted kale, red beet, golden beet - all Carl Wilson

Wednesday, July 20, 2011

Hail recovery hope

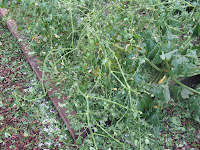
To encourage those with gardens struck by hail, this post features pictures from a previous year's hailstorm. While chances of recovery depend on the extent of the damage, plants can surprise. Fruiting vegetables always seem to sustain the worst damage, particularly the big-leafed vegetables like squash and pumpkins. Roots escape underground and regrow. Leafy vegetables generally come back.

These photos of tomatoes and straightneck summer squash are from a July 21 hailstorm. White hailstones are visible in tomato photo. Click on photos to see enlarged view.


The photos below show plants August 17, about a month later. The Yellow Taxi tomato is sparse and shows hail-nicked foliage but did ripen fruit. The summer squash put on an amazing amount of growth and more fruit.


Photo credit: All five photos in post - Carl Wilson
Saturday, July 2, 2011

Use of Mid-summer Transplants


While many people think of transplants as only a May start-of-season planting technique, they can also be useful in midsummer for planting crops for fall harvest. In midsummer you don't even need a greenhouse to grow them!

There are always two ways to plant - direct seed or transplants. Mid-July is a rough date to have 50 to 60 day vegetables direct seeded to mature for fall. Using this target date, you can plan whether transplants or direct seeding will best work in your crop scheduling following spring crops.

Perhaps you have a crop growing that won't be harvested in the end of July and direct seeding another would not allow it to mature before frost. Answer is grow transplants. Or perhaps you have difficulties directly seeding the garden because of wind and sun, soil crusting or other physical soil condition, inability to frequently water to germinate seed, garden pests on young seedlings or whatever reason. Transplants may work better for you.

Growing transplants in pots placed on the ground (or bark mulch) as pictured works well. Floating row cover fabric thrown over the pots and tucked under the trays conserves water and helps seeds to germinate. Remove when seedlings have begun to develop true leaves or leave on to protect from birds and insects. Grow for 4 weeks or so and you are ready to gain a jump on the fall harvest season by transplanting into your growing beds.

Photo credit: Trays of pots growing on bark mulch, Kale (bottom) and beets (top) grown as midsummer transplants - both Carl Wilson

Sunday, June 26, 2011

Cool to Hot update

Flea beetles are a concern on tomatoes that were set out in May before weather was settled. These plants were stunted from the cold nights and have struggled to begin rapid growth even with the last week of hot weather.


Key to overcoming flea beetle feeding is to promote rapid growth of transplants and seedlings. Flea beetles jump from the soil and attack lower leaves first (photo right). If a transplant grows rapidly as did this tomato set out June 5 (see photo left), they overcome injury. For details and control suggestions for flea beetles that infest tomato family, cabbage family and other plants, see the CSU Extension fact sheet Flea Beetles.


Cilantro flowering has promoted more questions than usual this season. The quick change from cool to hot weather caused plants to rapidly develop flower stalks. Both temperature and day length influence flowering. In hot weather during the long days of summer, cilantro rapidly produces flower stalks with ferny foliage as opposed to the desireable flat leaves (photo shows both).


Plants induced to bolt produce flowers and set seed in four to six weeks from time of sowing. If you purchase transplants, they can quickly start to flower too. Grow plants in cooler shade to delay flowering. Sow a succession of cilantro seed every few weeks through the summer to produce a constant supply of the herb. In cooler spring weather, cilantro will keep in the leafy stage weeks to a month longer.


Note that if plants go to seed, you can make coriander spice from grinding the seed instead of harvesting cilantro leaves.


Photo credit: Flea beetle injury lower tomato leaves, Tomato transplant outgrowing flea beetle injury, Cilantro - All Carl Wilson

Sunday, June 19, 2011

Hail NO!! - But for some unfortunately YES

June is always an unsettled weather month in between cool May and hot July. Hail has already been a worry for growers and some have already taken their licks. A June 8 storm nailed Ft. Collins and a short pelting got a vegetable project I'm working on in Denver on June 13.

Vegetables with broad leaves take it hard as evidenced by the broccoli photo right. Soil may also crust afterwards as seen in this photo from a clay soil northeast of Ft. Collins. With the heavy rains that frequently accompany hail, it is often best to stay off the soil until it dries out to avoid further compaction. There is little you can do at that point anyway. Once soil dries, cultivation to break up crusts may be helpful.

Hoops for low tunnels with floating row cover fabric at the ready may offer some protection if you're on the spot to pull up covers when hail threatens. If hail stones are large, fabric may be shredded and protection value likely decreases.


Patience is a virtue after a hail storm. Once it is time to water again, consider weak fertilizer in the water to add to the stimulus for new growth delivered by the hail pruning. If plants aren't responding after a few weeks, remember the possibility of early July seeding of the 50 to 60 day vegetables for fall harvest.


Vegetable plants are resilient following hail and growers can only imitate that quality.


Photo credit: Hail damage on broccoli, Soil crusting following hail, Low tunnels and row cover fabric - All Carl Wilson

Friday, June 10, 2011

To Mulch or Not

Vegetables are sensitive to environmental changes and the recent mix of hot and cold weather has had effects not just on transplanting warm season vegetables as mentioned last post. Some early season crops have already started to produce flower stalks. Remove and use the space to seed or transplant other vegetables maximizing production. Selecting a succession vegetable from a different plant family is good crop rotation practice.

If lettuce bolts for example, planting a rotational root vegetable such as carrot contributes to soil health as would adding compost before seeding. While carrots are easier to seed when weather is cooler, seeding is possible even in hot weather.

Carrots require 14 to 21 days to germinate. The chances of the seedbed drying out in this time are greater than with 7 days to germination seed. There is simply more time for something to go wrong whether it's windy weather or an irrigation problem that leaves soil dry.

Mulching with floating row cover fabric is one good solution for most seeded crops. To further increase chances of success with a many days-to-germination crop such as carrots, try doubling the mulch cover. Place grass clippings on top the fabric. Water easily percolates through both to wet the soil.

Periodically check under the fabric for signs of germination particularly once the 14 day mark approaches. Clippings are easily gathered when lifting the fabric and can be used elsewhere in the garden or in compost. Clippings alone generally are not used with carrots because they entangle with the ferny foliage.

As for mulching elsewhere in the garden in early June, definately avoid mulching peppers. It may be tempting to apply mulch during tranplant establishment but mulch delays soil warming. Wait until early to mid July to mulch peppers so soil thoroughly heats. This can make the difference between a good versus a poor or no harvest of peppers.

As for other warm season crops, it may be early to mulch them too. Efforts are probably better placed on proper watering and fertility to get plants established and hasten growth so they can outgrow flea beetle invasion that is common this time of year. More information on control of this insect can be found in the CSU Extension fact sheet, Flea Beetles.

Photo credit: Lettuce flowering, Seeding carrots, Double mulching with grass clippings over fabric - all Carl Wilson.

Tuesday, May 31, 2011

Pull the trigger on warm season transplants


It looks like this will be the week that temperatures finally warm up for good along the Front Range making it safe to plant the warm-night loving vegetables. If you've been able to walk the tightrope between maintaining transplant condition while keeping them indoors at night and outdoors to harden on decent days, versus planting in the garden because they are too big, congratulations.

For those who have managed transplants to hold for planting this week, the warm nights above 50 degrees F should promote rapid establishment and growth. If you had to transplant last week or earlier, your plants may sit stunted for a while until they recover. Unfortunately this adds days to harvest to your tomatoes, peppers and other warm season plants.


While frost danger appears to have passed in Denver on May 2nd (31 degrees F), the night temperature was 33 degrees F on May 16. Although mostly in the forties and a few high thirties since then, it was still cold to think about setting out squash, peppers, tomatoes, eggplant and others.

Fertilizing transplants to keep them in good condition was helpful as long as this didn't cause too much new growth. A fully soluble vegetable fertilizer that contained phosphorous as well as nitrogen helped avoid purple backs to leaves, a sign of phosphorous deficiency.


Some plants that ran out of fertilizer could be turned around by fertilizing as these tomato transplants have been.


Photo credit: Fertilizing transplants, Phosphorous deficiency on tomatoes, Tomatoes turned around with soluble fertilizer - All Carl Wilson

Thursday, May 26, 2011

Holding transplants


  • With forty degree nights, growers are in a balancing act between how long transplants of very tender vegetables can be held versus planting and knowing they will be set back by the cold.

    Many transplants may be running out of nitrogen as seen on the tomatoes in the top of this photo. These plants are starting to come back with addition of a soluble nitrogen fertilizer when watering. A product that also contains phosphorous is useful to avoid the purple backs of leaves seen with phosphorous deficiency. The tray of plants at the bottom of the photo received regular fertilization.

    Don't apply too much fertilizer or you will end up with lanky growth. Of course these plants could be bumped up to pots larger than the 4 inch ones they are in but that is hardly desireable considering planting can hopefully be done in a week or so once nights are at least above 50, preferably 55 degrees F.

    What can be done in the meantime while waiting for warmer nights?

  • Harden off plants by moving them outdoors on suitably warm days and back in at night.

  • If tramsplants are very tender cover them with floating row cover fabric while outside. This should prevent sunscalding until they've adjusted to higher light intensity and have hardened off.

  • Maintain enough fertility to keep transplants growing and leaves from turning yellow.

  • Remeber that transplants set out too early or transplants running out of fertilizer require recovery time which adds to the days to harvest time.


  • Keep blossoms pinched from plants. Now is not the time to set fruit as you want to keep them in vegetative growth, not flowering/fruiting growth.


  • Watch the weather forecasts for when night temperatures are predicted to be 50 degrees F or higher.


  • Transplant tender (not the very tender) transplants such as cucumber and summer squash that tolerate cool nights as long they are above freezing. Remaining cool season vegetable transplants such as chard, beets, romaine lettuce that will hold up better in summer heat, cauliflower, etc. can be put out (photo).


  • Finish any soil prep such as compost additions and build new beds while weather is cool to work.

Photo credit: Held tomato transplants, Planting cabbage, romaine lettuce, Swiss chard - Both Carl Wilson

Friday, May 20, 2011

Anxious to Plant

Like everyone else, we are wondering when temperatures are going to thoroughly warm in order to transplant warm season vegetables to the garden. The five day forecast consistently shows "lows in the lower to mid 40's." For tomatoes and peppers, nighttime lows should be no lower than 55 degrees F.

The problem everyone is having is tomatoes stuck in the greenhouse getting leggy. Getting them out of a humid greenhouse where they can be put out on warm days and brought indoors into a non-greenhouse (drier) environment for night protection is ideal for hardening off. This should slow growth and curb leggy tendencies.

The outdoor part of this daily plant shuttle should have them located in a protected, short sun exposure location. Plants exposed to intense Colorado sun often sunscald because they have not developed the chlorophyll-protective plant pigments to shield them from UV and intense light.

One tomato plant brought to me this week for diagnosis showed the typical bleached, thin tan tissue typical of high light exposure. Transplants grown indoors during the cloudy spring weather we've had don't have the ability to stand up to the occasional clear day of intense Colorado sunlight.

Meanwhile, cool season vegetables such as this pak choy are happy growing in the cool, moist weather. The warm season transplants are just going to have to wait until Memorial Day weekend or later for the warm nights they require.

Photo credit: Greenhouse tomatoes and Pak Choy - Carl Wilson